Trend Micro Worry Free Business is a great security solution that is used by many of our small- to medium-sized customers to protect their PCs and virtual desktops. After performing a handful of deployments with VDI environments and physical PC imaging deployments, we realized the process is very manual and time consuming. This is due to the requirements for the client agents to have a unique identifier.
You would think that it would be simpler to just to put the Trend security agent in the golden image for VDI or the base image for a traditional imaging solution for physical PCs, but that is not the case. Each agent has a unique GUID that will identify the machine with the cloud management console and the cloning operation doesn’t generate a new GUID for the Trend client whether it is a VDI machine or deployed with traditional imaging software.
When cloning an image you will have to run the Security Agent ClientID Regeneration tool provided by Trend Micro or manually install each agent on a per-machine basis. This process proved to be very time consuming. We chose to tackle automating this process for the sake of time. After researching the options, we discovered that Trend Micro has provided a fairly simple VBscript for service providers. More information on the installation process can be found here.
We utilize the AppSense Desktop Now suite for our VDI solutions to manage policy and user environment management needs. The Environment Manager component from AppSense Desktop now is a simple yet powerful tool that can be used to handle any use case that a traditional startup or logon script would handle.
With that said, we reverse engineered the steps from the VBscript that Trend Micro provides and utilized a node within the “Network available” trigger inside an AppSense Environment Manager policy. Since the network is required for the Trend agent to register with the cloud management console the “Network available” trigger makes the most sense compared to computer startup or user logon triggers. The logic is very simple. The process checks to see if the Trend agent is installed or not as soon as the network is available. If the agent is not installed then the installation process kicks off and installs the agent and registers with the cloud console. If the agent is detected then the process will just move along to the next task.
Here’s how to set this up in your environment:
To start out you will need to login to the Trend Micro Worry Free Business Security portal and get some information.
- Logon to the Trend Micro Worry Free Business Customer portal and launch the console
- Go to devices and select the Device (Default) group and select add devices then select the Download Package button to download a local copy of the Agent installer
- Click the “For Service Providers” link and copy the Unique Identifier for later use.
- Place the WFBS-SVC_Agent_Installer on the NETLOGON share for your domain. \\yourdomainname\NETLOGON\
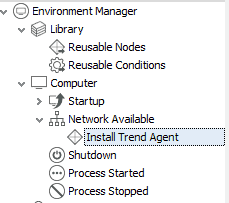
Open your current configuration for AppSense Environment Manager and create a new node called “Install Trend Agent” under the Network Available Trigger.
It should look like this
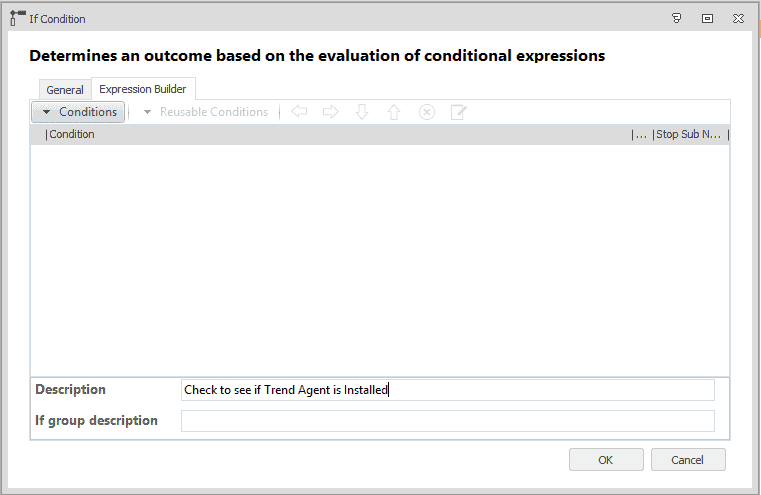
Next you will need to create an “If condition” by right clicking in the white space on the right panel and selecting Condition > Flow Control > If Condition.
Give it a description of Check to see if the Trend agent is installed.
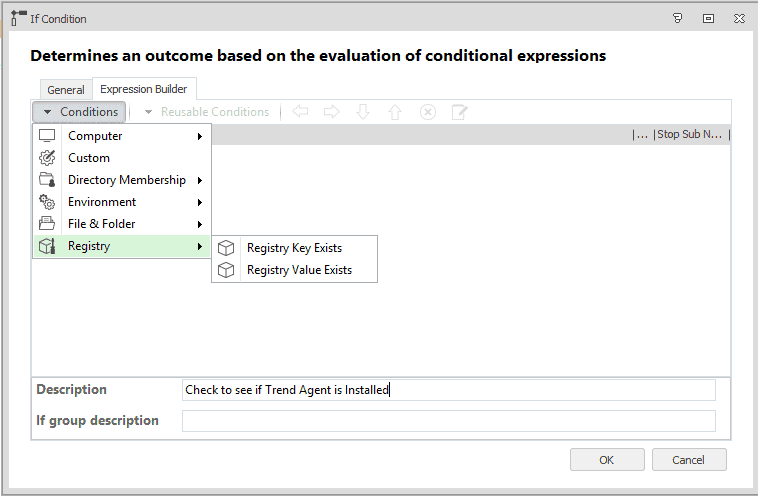
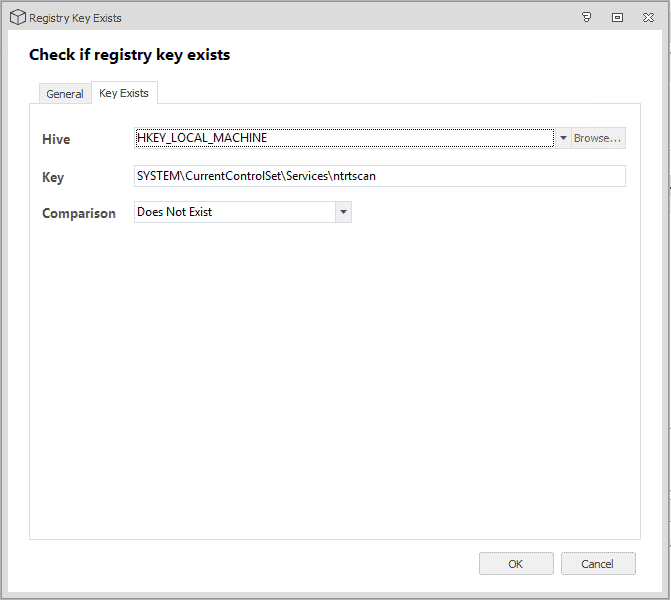
Next select the Condition dropdown and select Registry > Registry Key exists.
Next Enter the key value for HKEY_LOCAL MACHINE of SYSTEM\CurrentControlSet\Services\ntrtscan and select the comparison of Does Not Exist from the dropdown:
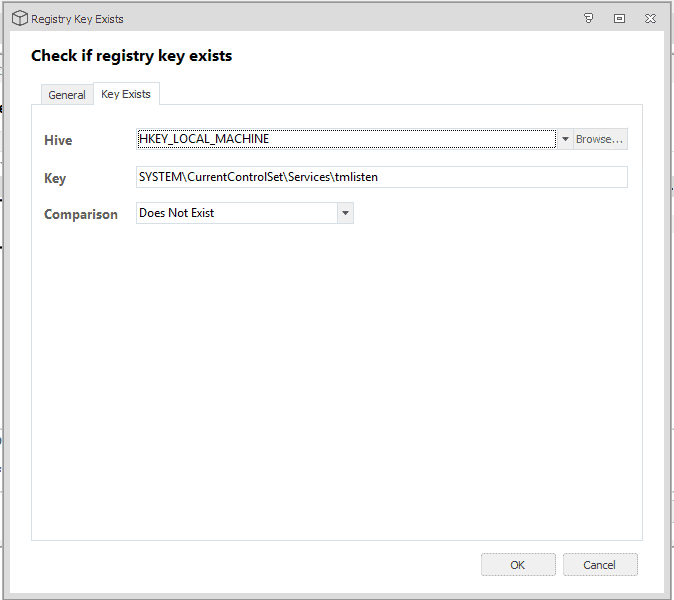
Create another Condition for HKEY_LOCAL_MACHINE of SYSTEM\CurrentControlSet\Services\tmlisten and change the comparison to Does Not Exist:
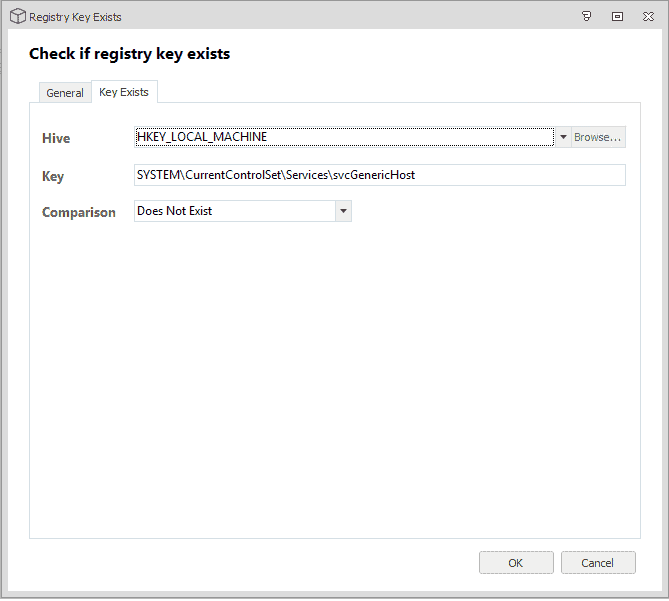
Next create the last condition for HKEY_LOCAL_MACHINE of SYSTEM\CurrentControlSet\Services\svcGenericHost and select Comparison Does Not Exist:
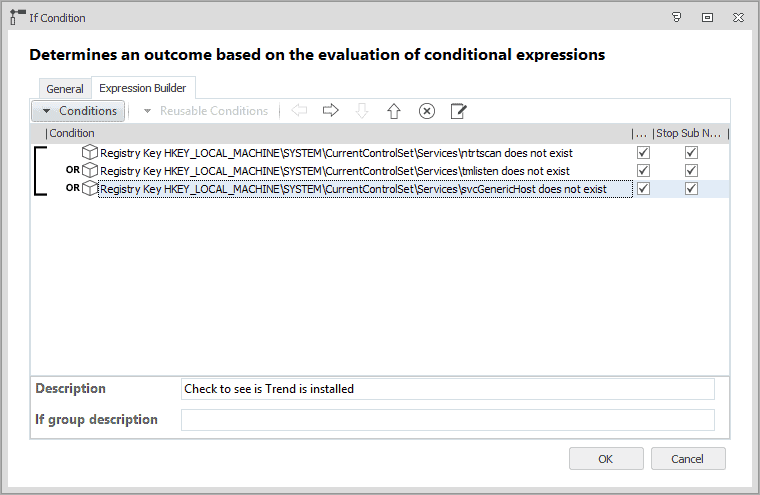
At this point you should have a condition statement that looks like this:
Under the “If condition” that you just created right click and select Action > Custom & Execute > Execute.
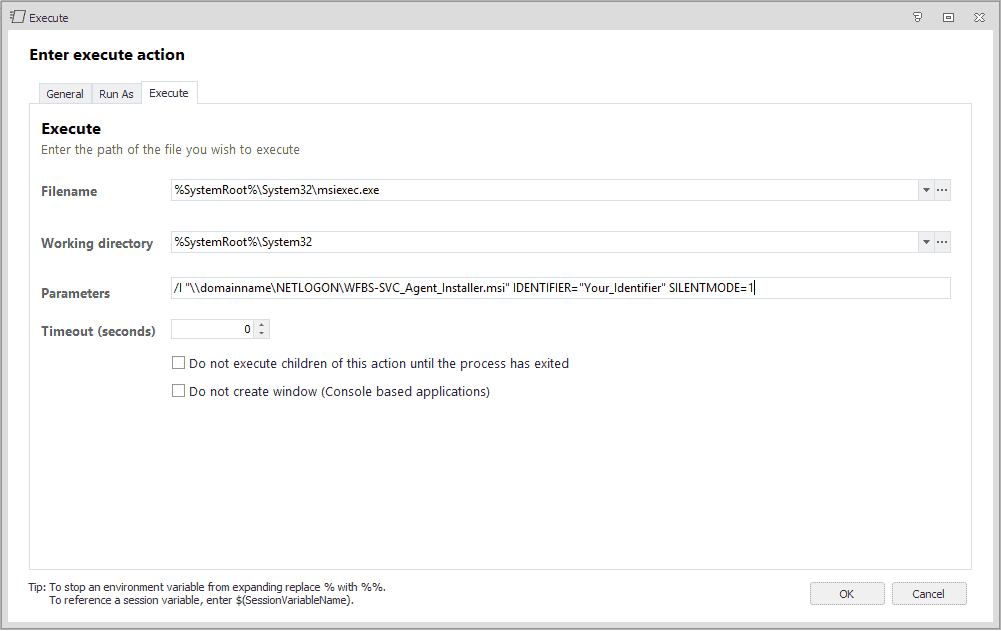
Fill in the following information:
Filename: %SystemRoot%\System32\msiexec.exe
Working Directory: %SystemRoot%\System32
Parameters: /I “\\domainname\NETLOGON\WFBS-SVC_Agent_Installer.msi” IDENTIFIER=”Your_Identifier” SILENTMODE=1
Copy the identifier that you copied from the Trend portal earlier and paste in where it says “Your identifier” while keeping the quotation marks intact. Fill in your fully qualified domain name where it says “domainname.”
Leave the other options at default.
After you fill it all in, it should look like this:
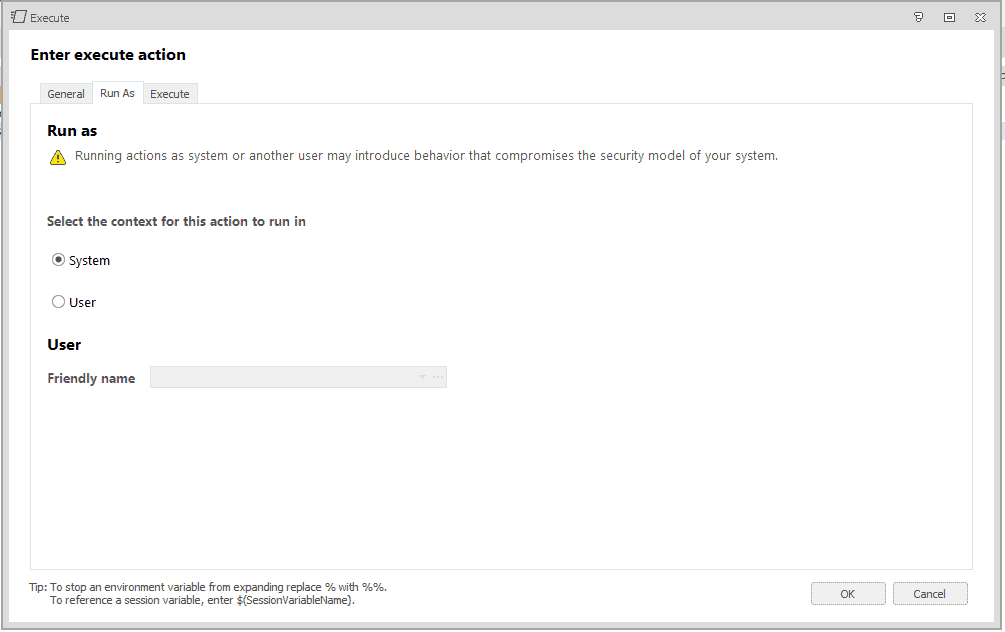
Next select the “Run As” tab at the top and select the system option and select “OK”:
Save your Environment Manager policy and deploy the config to the test group to validate. After the config has been deployed reboot the test machines and then login in to the Trend console to see if your machines are registering properly.
Once you have validated this config you can push it to your production deployment groups in the AppSense Mangement Console.