A recurring question that clients seem to have after a Lync 2013 or Skype for Business deployment is, “How do I change the message on the Auto Attendant?” On the surface, this seems to be a simple answer: just record the new message and set the Exchange Auto Attendant to use the new message. Easy enough, right? Well, apparently not.
For custom greetings, Exchange requires this file to be in .wav format, Linear PCM (16 bit/sample), 8 kHz. A quick search of the internet would lead you to believe you need to purchase any number of audio recording packages, or download questionable “free” software in order to easily create these recordings. Luckily, there’s an easier way to do this, placing the power to record a new greeting into the hands of anyone you desire, thereby allowing them to change their Auto Attendant greetings from anywhere they want.
The inestimable Tim Harrington provided a most excellent solution to the recording dilemma in his 2011 blog post “Delegating Users the Ability to Change Custom Audio Prompts for Auto Attendants in Exchange 2010 Unified Messaging”. This allows you to call into the Auto Attendant, hit #, then *, enter your extension and your voicemail PIN, and magically record a new greeting, just like you would your voicemail message. And yes, this works for Exchange 2013 as well… but what about Exchange Online? Ah, yes, that wonderful cloud-based solution that we all have come to know and love. The process is quite similar, with an added step: setting up a PowerShell session with your Exchange Online tenant so you can set TUIPromptEditingEnabled to $true on your dialplan. Therefore, in the interest of padding this blog post and keeping you from having to go to someone else’s blog to find the answer, I give you… SCREENSHOTS!
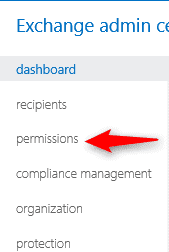
Log into your Tenant and under Admin choose Exchange:

Next go to Permissions. Now, before I get comments like, “You don’t have to choose it from there, you could choose it from the selections on the right and just go to admin roles,” yes, I know. I saw it there. But you can also get to it this way, and this is what I got the screenshot for, so there.
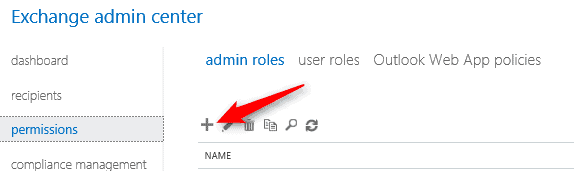
Oh look! Clicking permissions got us to the Admin Roles page. Go ahead and click that + sign.
Now you find yourself presented by the Role Creation Wizard.
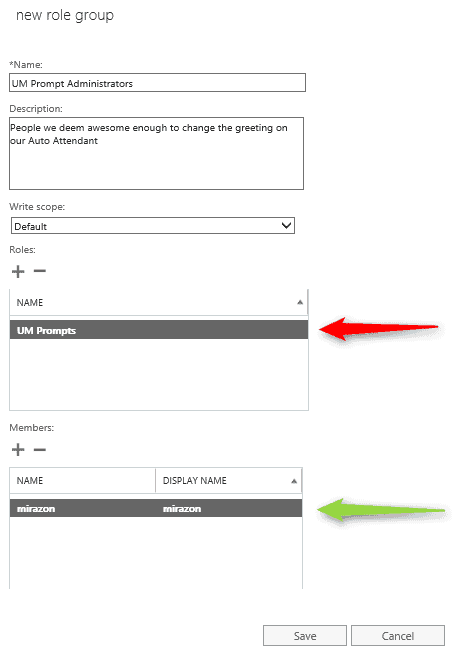
The key items on this are the Role and the members. Choose the UM Prompts Role, and then anyone you drop into the members box is going to be able to call in and change your greeting on your Auto Attendant. I cannot even begin to stress the importance of being careful with this. With great power comes… something something popcorn, and you don’t want to have to deal with Jimbob from the mail room getting drunk one night and changing your company greeting.
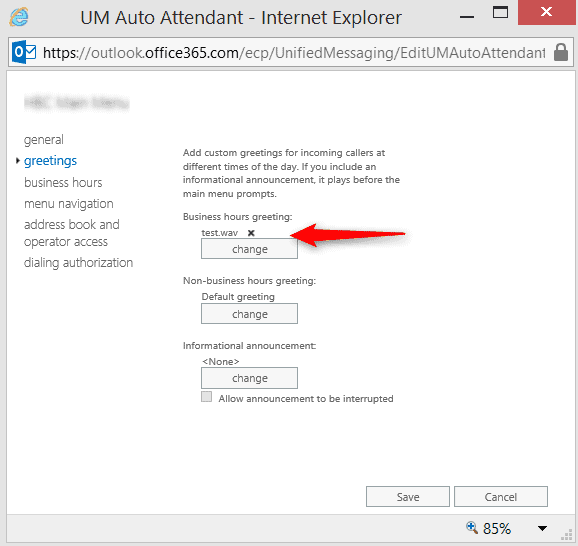
Now, you aren’t done quite yet with the Exchange Online Admin interface. I’m assuming you’ve already created your Auto Attendants and I don’t have to tell you how to access the properties for them, so go into the configuration for the Auto Attendant that you want to be able to change over the phone, and under Greetings, change that default greeting to something. Anything. Grab a random .wav file. It doesn’t matter what it is as long as it will let you put it on there. If you don’t have this “seeded”, then you can’t change the greeting.
By this point, you’ve now gotten a new Admin Role setup for changing the UM Prompts, you’ve added everyone but Jimbob from the mail room, you’ve got a junk .wav setup on your greeting, and you’re all ready to go, right? Yeah, not quite. That dialplan sitting out there in Exchange Online still has TUIPromptEditingEnabled with no value set, and until you set that to $true, all you’re going to get is frustrated trying to change that greeting.
In full disclosure, I want to make sure that I continue to give credit where credit is due, and direct your attention to the man with the plan, Yoav Barzilay. It’s from his blog post here that I was able to compile the following information for logging into the PowerShell session for Exchange Online.
Now being the good computer geek that I know you are, let’s turn to that PowerShell window that you’ve got open running as administrator and type $creds = Get-Credential. If you didn’t already have a PowerShell window running as administrator, well, I guess we’ll wait for you to catch up, then.
Did you get it open? Did you type $creds = Get-Credential? GREAT! Then you see something like this:
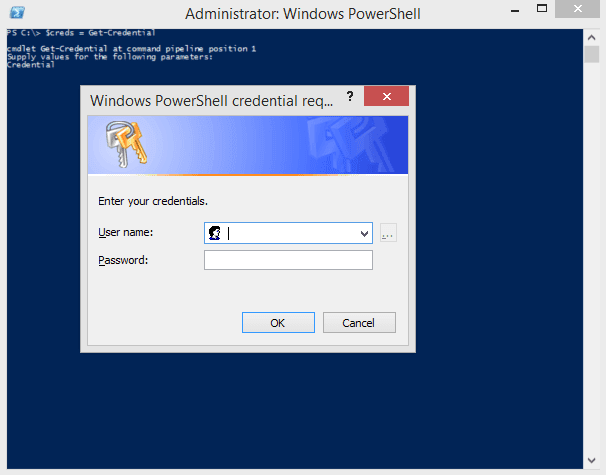
The creds you need here are the Admin creds for your Exchange Online tenant. Yes, the same ones you used earlier. Then, click OK to return to the Prompt. An explanation for those who aren’t so versed in PowerShell: we just stored your Admin creds so we can initiate a PowerShell session to Exchange online using this command:
$365 = New-PSSession –ConfigurationName Microsoft.Exchange –ConnectionUri https://ps.outlook.com/powershell -Credential $creds -Authentication Basic –AllowRedirection
When you run that, you’ll get something that looks a bit like this:
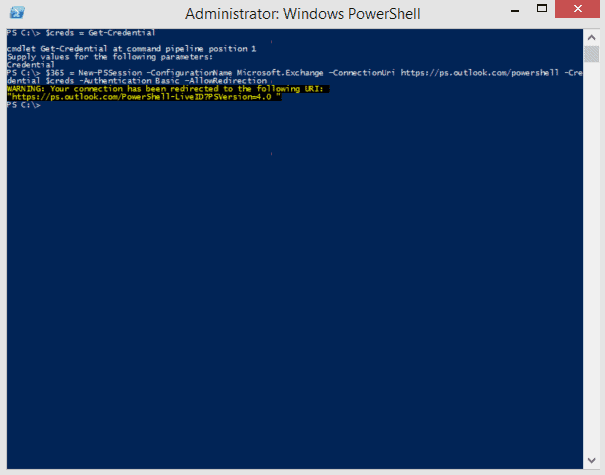
Don’t freak out over the “Warning: Your connection has been redirected” message. That’s why we put the –AllowRedirection on the end of the command in the first place. Lastly, we have to import the session we just created, so we can be connected to Exchange Online. Type $importresults = Import-PSSession $365.
No screenshot for this one, as it really just results in another prompt. Sure, it imports some modules, runs the progress bar a few times, but seriously, you just get a prompt. If you didn’t get a screen full of Red, then it worked. Trust me. Would I lie to you?
Once you’re back at the prompt, type Get-UMDialPlan and hit Enter. This will return your list of Dialplans that are configured in Exchange Online. If you have more than one, then you need to figure out which dialplan the Auto Attendant that needs to be changed is created under, and that’s the dialplan you’ll be changing. Oh yeah, and the results of Get-UMDialPlan look something like this:
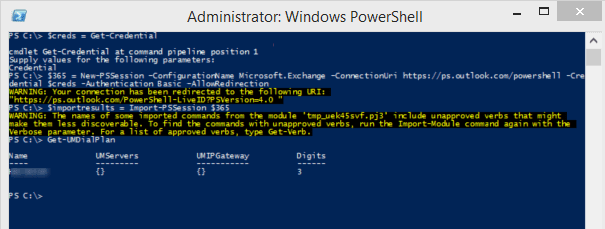
Yeah, I blurred the name. I saw on the news where them folks on the Dark Interwebs can hack your toilet if they get your discarded gum wrappers. You think I’m going to give you the name of my Dial Plan? I shudder to think what you could do with THAT information!
Now on your PowerShell session, you’re going to take the name that returned for YOUR Dial Plan and type Get-UMDialPlan <YourDialPlanNameHere> | fl *.
And you get this set of awesomeness!
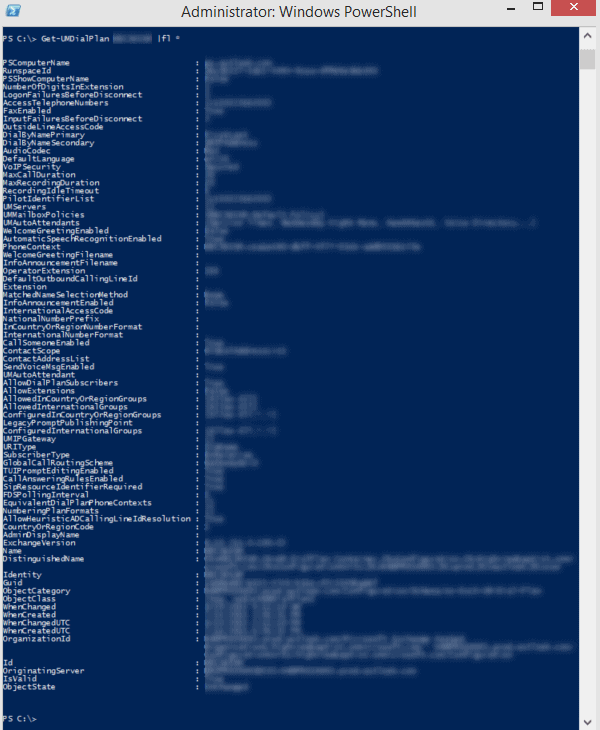
These, my friends, are the attributes of your dialplan. That’s all fine and dandy, but what we care about here is this:
![]()
Most likely yours is set to blank, and we need to get that fixed. So here you go:
Get-UMDialPlan <YourDialPlanNameHere> | Set-UmDialPlan –TUIPromptEditingEnabled $true
Give it a few moments after running it, and then re-run Get-UMDialPlan <YourDialPlanNameHere> | fl * to make sure that TUIPromptEditingEnabled is indeed set to True. If it is, you’re good to go. Call the Auto-Attendant that you want to change. Once the recording starts, hit # then *, follow the prompts, and just like changing that message on your voicemail, you can now change the greeting on your Auto Attendant!
A couple items of note:
- Remember, if you haven’t seeded the Auto Attendant with a temporary custom greeting, then it won’t allow you to change it.
- The filename of that custom greeting will not change when you change the greeting using TUI Prompt Editing, so you go into the Auto Attendant, and it’ll still look the same as it did when you uploaded the original file. Yes, I know, kinda an obvious thing, but I’ve seen people confused by this behavior.
- When you get signed in using your extension and voicemail PIN, it’ll ask you which prompt you want to change. Many people have just the business hours prompt, and the auto-voice will only give you that as an option, but don’t freak out if it gives you the option of changing the after-hours prompt. It just means that you have an after-hours greeting configured as well.