
Why Use Dynamic DNS?
Your DNS records — the internet’s phonebook, essentially — for your website, security camera system, remote access, or other externally facing services hosted internally need to be able to be consistently accessible. This can be a problem if your IP address changes regularly, like if you do not have a static IP address from your ISP or you have an internet failover solution. If your IP address changes but your external DNS records do not, then traffic will go to the wrong site. If your phone number constantly changed, how would people know how to reliably contact you?
Dynamic DNS will update your external DNS records to match your IP address changes quickly to minimize or prevent outage. Of course, this also requires a low DNS Time To Live (TTL) expiration time of the records, which may require you to move your DNS to a service that allows lower TTLs. For this type of solution, we recommend DNS Made Easy. DNS Made Easy allows for very low TTL settings whereas many DNS hosting companies will only let you go to a minimum of 3600 miliseconds or one hour. So, if your IP changes, your external site or services could be offline for an hour or more.
DNS Made Easy’s site says that “If your computer uses a dynamic IP then it is recommended that your TTL is between 5 and 120 seconds.”
To clarify that: if you have a static IP address that rarely changes, I would not recommend setting a low TTL as it will unnecessarily increase DNS traffic. However, if you have dynamic DNS or are getting ready to do any type of IP or service cutover, I would recommended lowering your TTL in advance to minimize outages to services. Feel free to call us for guidance on any of this!
If you are interested in setting up dynamic DNS within DNS Made Easy, there are steps below. Remember that you can reach out to us any time during this process – we are a DNS Made Easy partner.
Using DynSite and DNS Made Easy for Dynamic DNS
Log into DNS Made Easy to the proper domain and start adding your record.
Enter in the name and an IP. You can use any IP to confirm it’s working, such as 8.8.8.8 or 70.70.70.70. The most important part is to put in your DNS password and enable dynamic DNS as shown below:
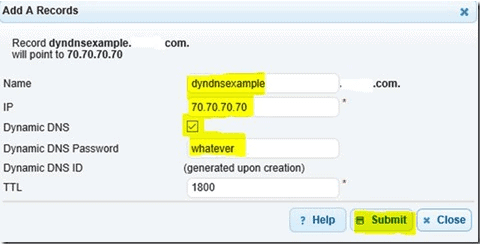 NOTE: If you need it online right away and can’t wait for the default 1800 TTL for the record to change from 8.8.8.8 or any other test address, then use the real IP address. If you use a fake IP, you probably want to browse to it first to make sure you don’t redirect people to a questionable or malicious site.
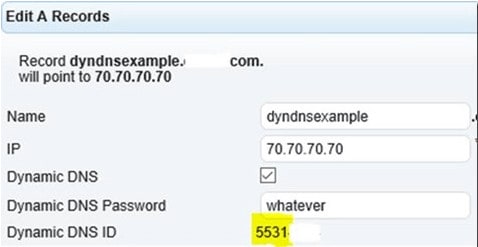
Once you hit submit, it creates a DNS ID. You will need that DNS ID and password later for DynSite setup:
 Download DynSite DNS app
Please note: This is not the most modern-looking GUI or application, but it works and is endorsed by DNS Made Easy and the cost is minimal.
Install the program on the server that needs dynamic DNS or another server in that network that is almost always online if all systems have the same outgoing IP.
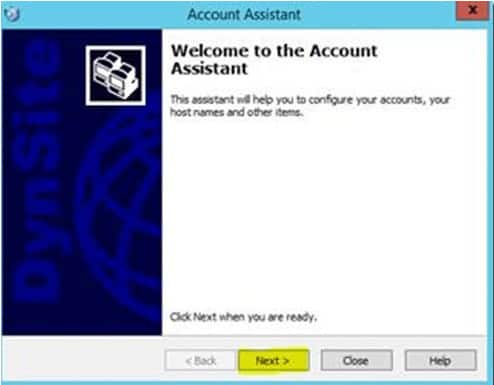
Once you complete the base OS installation, it will begin the Account Assistant as shown below:
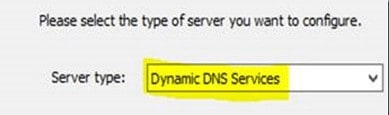
 Select “Dynamic DNS services” as shown below:
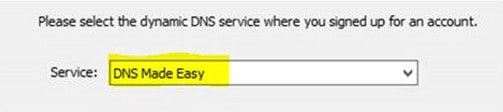
Hit “Next” and select “DNS Made Easy” as shown below:
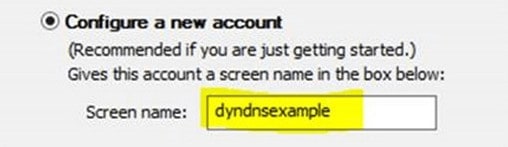
 Next and now enter in the name of your DNS record it can be named anything but to make it easier for someone to follow in my example for dyndnsexample.mydomain.com, I used “dyndbnsexample” below:
 Here is where you will input the code that DNS Made Easy created for you and enter in the password you assigned. In my example below, “whatever” is the password that is starred out:
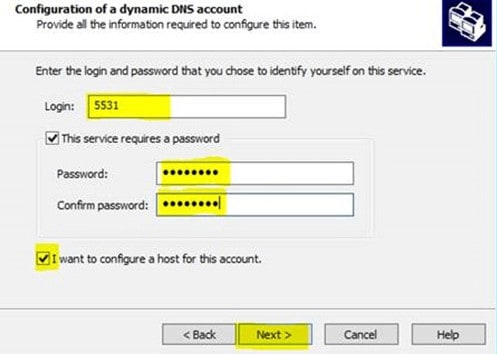 Check “I want to configure a host for this account” and select “Next.”
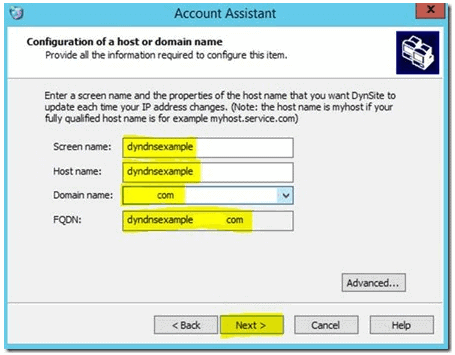
Now put in your screen name, host name, and domain, such as mydomain.com and confirm the FQDN:
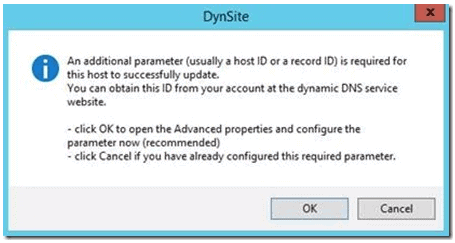
 Select “Next” and you will receive the following warning. Then select “OK.”
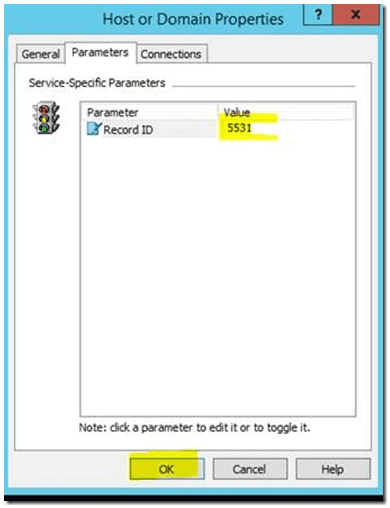
Now you need to put in your Record ID. This is that same code that DNS Made Easy generated for you and select “OK,” as shown below:
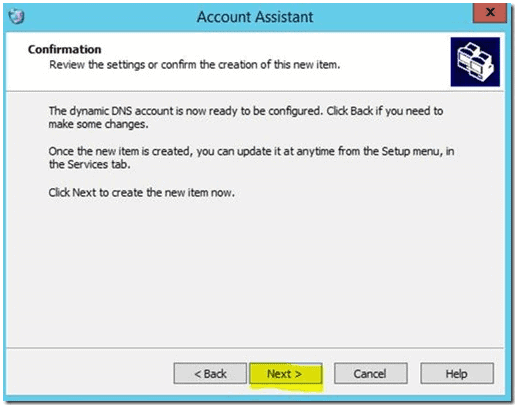
Click “Next” and then “Finish” to complete the Account Assistant:
You can than open the DynSite console and view the status:
![]() If you do a refresh on your DNS Made Easy DNS page you will see it update the IP from 70.70.70.70 to the current External IP address to confirm all is correct and running.
If you do a refresh on your DNS Made Easy DNS page you will see it update the IP from 70.70.70.70 to the current External IP address to confirm all is correct and running.
Note: You will need to activate DynSite within 30 days — it is not freeware!