
 If you are using wireless or a physical connection on your Windows 10 system and you want to use one or the other as the default for gateway/WAN traffic routes, you can set it up by running binding order commands in Windows 10 in PowerShell.
For example …
I am plugged in at a site’s physical connection working on the local network which goes through strict external routing/content rules. Those rules block me from using my remote access programs like Skype for Business or Pandora, etc.
I enable my wireless and use my iPhone hotspot (but you can use another MiFi device if you want). However, even though it connects, traffic by default is still bound/routed to the physical connection.
To get around this, I:
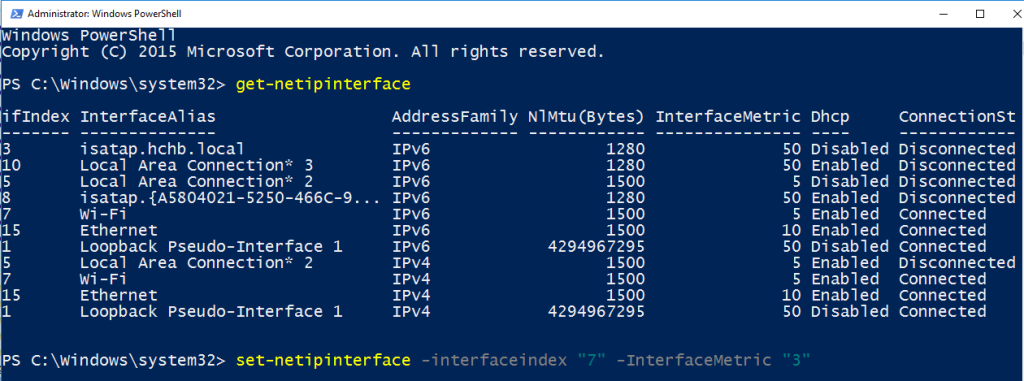
Open PowerShell as administrator and run the following commands to locate your Wi-Fi and Ethernet “ifIndex” (interfaceindex) …
get-netipinterface
Review the results listed and revise the one I want to be the default gateway/WAN traffic routes “InterfaceMetric” to be the lowest number as shown below for the “Wifi” interface 7.
The command in the example below is:
set-netipinterface -interfaceindex “7” -InterfaceMetric “3”
Alternatively, you can revise the other to a higher number to change the order as well.
To confirm your setting saved, simply run the “get-netipinterface” again.
Note: Remember this change is persistent, meaning it will stay this way untill you change it. Your “ifindex” number may change, but the interface metric should stay.
CAUTION: Make sure using a Mi-Fi or other wireless device is not a violation of your company’s compliance, security practices, and/or other policies.
For further reference:
- TechNet article, “Cannot change Network Binding Order in Windows 10“
- TechNet article on Set-NetIPInterface